To import stills on the SE-700, you currently need to capture them from a live input and save them to a memory slot. This ensures that your image files are compatible with the SE-700 system.
First, select the input with your image source, for example your computer displaying an image in full-screen, as Program Output.
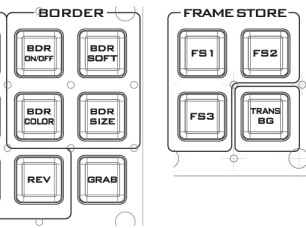
Next to the wipes is a button called Grab. That temporarily stores a still in the Freeze input channel.
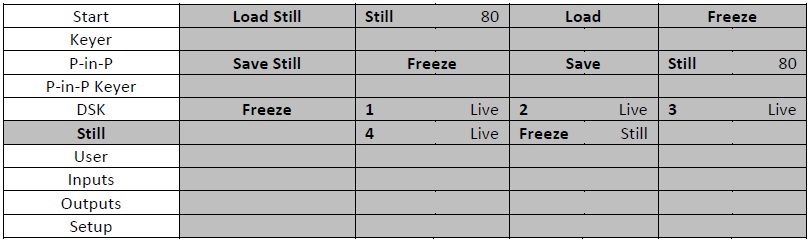
Go to the Still tab of the menu, change the input listed under Save Still to Freeze, choose a still number slot (default is 0), then select Save. The button should turn red while saving. This basically takes the freeze frame and stores it in a memory slot.
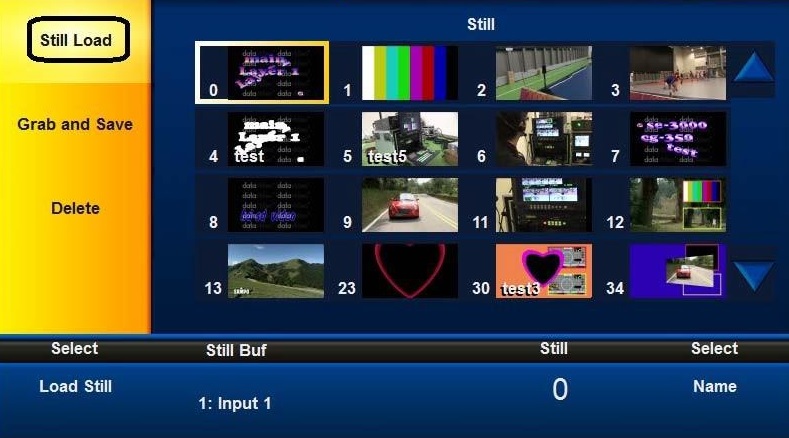
In firmware versions 1.1.1.1 and later, you will see a black and white thumbnail preview of your stored stills. The SE Controller software gives you additional features including color thumbnails and the ability to quickly select stills from a grid.
Then, under Load Still, change the channel to Still FS1, Still FS2, or Still FS3. These are your three active Frame Store slots for a given user preset. So if you select the still number you just saved to, and then press Load for one of those three channel options, it will save it to the frame store, which you will see on the multiviewer under Still.
Once you've loaded multiple stills, now all you need to do is press FS1-3 on the hardware keyboard and it will quickly load the still into the Still channel of the switcher, allowing you to cut and transition to it.
You can also load stills to spare input channels if you are not using them, as well as overwriting the Freeze channel with a loaded still from memory. To change a channel back to the live input, under the Still tab, go to Freeze, select the input/channel number, and press the down key until is cycles back to Live from Freeze.
You can either auto-save these settings to the default user profile when you boot the machine, or you can save your changes to User memory 1-6. User memories can easily be recalled by pressing the corresponding user button the hardware controller.
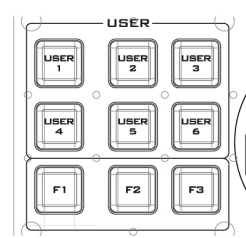
To quickly save a user profile, press and hold F2 on the top left corner of the keyboard panel, until you see User 1-6 blink, then press which user slot you want to overwrite. This action cannot be undone. Pressing F1 while the User 1-6 buttons blink will change the User bank and allow you to save to slots 7-12. Additional slots up to 99 are available in the menu.